Mastering the Symfony Upgrade: A Step-by-Step Guide
Symfony was created by Sensio Labs and first released in 2005. Since then, it’s gone on to become one of the most popular PHP libraries out there. It has over 600,000 developers from over 120 countries using it and 3,000 contributing to it. The framework is loved by managers and developers alike.
Although it might be 20 years old next year, it remains incredibly popular, with over 23 billion downloads since its creation. Symfony and Laravel remain the two big hitters when it comes to PHP frameworks.
It's widely used, has an active community supporting it and is trusted by major corporations including Spotify and Trivago. Other PHP projects including Drupal and Magento also use Symfony components in their stack.
However, if you've ever had to upgrade your Symfony project, you'll know it can be a bit of a struggle – there's sometimes a lot to learn and go over but hopefully, it isn’t too frustrating. Whether you're just patching up to the latest minor version or making the big leap to a major one, each step can come with its own problems.
In this post, we’ll see how to fix any issues that might arise whilst upgrading your version of Symfony.
Understanding Symfony's Own Versioning Scheme
Knowing the versioning scheme is key to a smooth upgrade journey. Symfony uses a three-part versioning system: major, minor, and patch versions.
Symfony’s Versioning Scheme Explained
- Major versions (e.g., 4.0, 5.0, 6.0): These are the game-changers, bringing significant updates that might break backwards compatibility.
- Minor versions (where the middle number changes, eg: 5.1 to 5.2): These introduce new features but keep things friendly with backwards compatibility intact.
- Patch versions (where the final number changes, eg: 4.1.1 to 4.1.2): These are used to fix minor bugs and make small improvements without shaking things up too much.
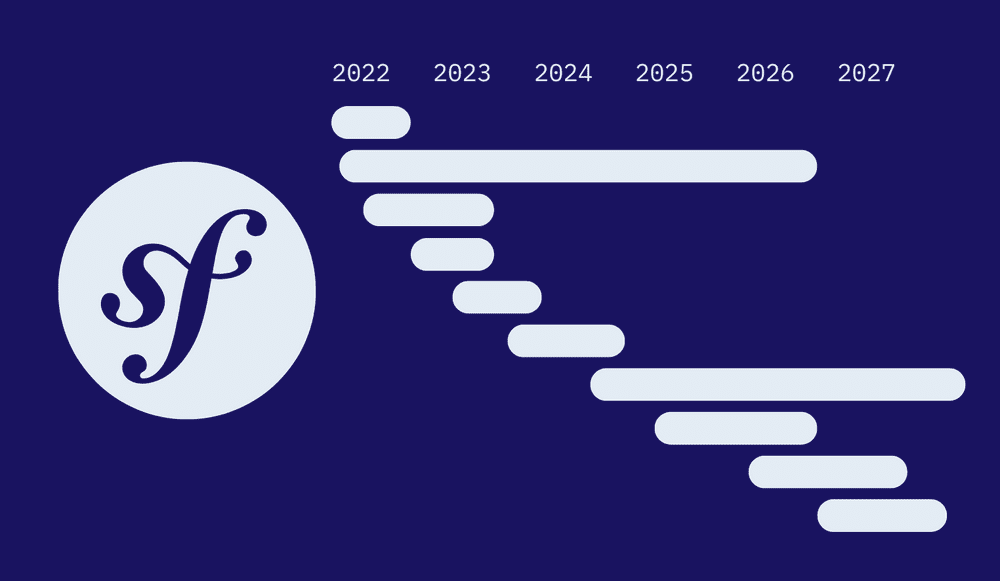
- Long-Term Support (LTS) Releases (eg: 4.4, 5.4, 6.4): If you're building applications with long lifespans, LTS is your lifeline. These versions receive three years of regular support and an additional year dedicated to security fixes, giving you exceptional peace of mind.
Understanding Symfony's own versioning scheme is crucial when choosing your upgrade path. It gives you a clear picture of the changes in each version and helps you anticipate what you'll need to fix and debug during the upgrade process. More on that topic in the Symfony Versioning article.
Preparing for the Upgrade
As every developer knows, spending a bit more time preparing for the upgrade can save you countless hours of troubleshooting down the line.
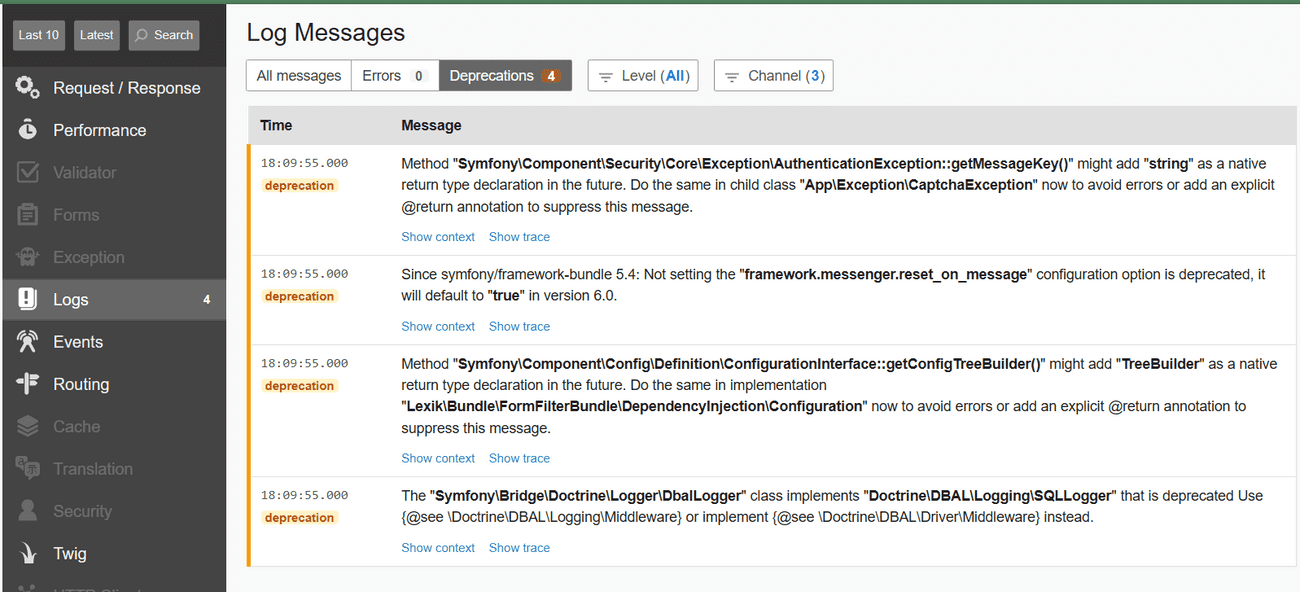
First things first, head over to the Symfony Releases Page. One key detail to pay close attention to is the PHP version requirement. This is especially important for major Symfony upgrades, as this can also involve a PHP version change. To get the lowdown on what’s new, you can check out the PHP changelogs and PHP.Watch. You should also review the Symfony deprecation logs in your project to see the warnings for what might be deprecated or not compatible with the new version. Since Symfony 5.1, a deprecation log can be sent to a dedicated channel.
It's also helpful to upgrade regularly to ensure that you don't have to jump forward two versions and create the potential for more compatibility issues.
Checking for Backwards Compatibility Breaks
When it comes to major version upgrades, backward compatibility breaks are what's most likely to cause issues. To navigate these changes, you'll want to locate the UPGRADE-X.0.md file in your Symfony project. Look for entries marked with BC break - these indicate breaking changes that you'll need to address. Thankfully, the Symfony team provide a comprehensive guide on backwards compatibility, which you can find on their Backward Compatibility Promise page.
Assessing Your Code’s Readiness for the New Symfony Version
First off, you'll have to tackle any deprecated functionality in your codebase. The UPGRADE file in the GitHub repository (eg - UPGRADE-6.0.md) will highlight these deprecations, so you can address them head-on before moving ahead. Taking these steps will help ensure your code is ready for the new Symfony version.
Upgrading to a New Major Version
Upgrading to a major version in Symfony involves a more thorough code review as it removes deprecations introduced in the previous minor versions. Although thankfully, the process is fairly similar to upgrading minor versions and the next steps will guide you through the process to ensure a successful upgrade.
Making Your Code Deprecation Free
Deprecations in PHPUnit
Before upgrading to a major version, ensure you're running the latest minor version, as doing so will allow you to see all the features and functionality that will be deprecated in the new major version.
You can find code deprecations in:
- Dev Environment Console Logs: Deprecations will be logged when running the application in the development environment.
- Symfony Profiler: As you can see below, you'll find deprecations for the routes you visit under the Logs section
So, here's the deal - by default, deprecations will pop up in the logs only for the routes you actually visit. If you want to see all the deprecations, you have to go through each route or page yourself.
You can also use PHPUnit to show deprecations in your tests, which is disabled by default. First, install phpunit-bridge with:
composer require --dev symfony/phpunit-bridgeRunning ./bin/phpunit will then show deprecations for the tested code paths. The command ends with 0 once all notices are successfully fixed.
Tools like PHPStan can help you improve your PHP code quality after the Symfony upgrade without writing tests (but of course, don't forget about testing completely!).
Updating to the New Major Version via Composer
In the composer.json file under the require block you’ll see some library options for symfony/config. You’ll have to upgrade these to the new version, eg - 6.4.* to 7.0.*like below.
{
"...": "...",

"require": {
-         "symfony/config": "6.4.*",
+         "symfony/config": "7.0.*",
-         "symfony/console": "6.4.*",
+         "symfony/console": "7.0.*",
          "...": "...",

“...”: “A few libraries starting with symfony/follow  their own versioning scheme (e.g. symfony/polyfill-[...], symfony/ux-[...], symfony/[...]-bundle). You do not need to update these versions you can upgrade them independently whenever you want”,

”symfony/monolog-bundle”: “^3.10”,
      },
"...": "...",
}
At the bottom of the file, you’ll also find another extra block which you’ll want to upgrade.
"extra": {
    "symfony": {
    "allow-contrib": false,
-	"require": "6.4.*"
+	"require": "7.0.*"
    }
}
Once these changes have been made, perform the upgrade in Composer with the command:
composer update "symfony/*"For major version upgrades, make sure that you remove the cache directory:
## For Linux, macOS and WSL
rm -rf var/cache/*

## For Windows
rmdir /s /q var\cache\*
Adapting to the New Major Version
Adding Native Return Types
This section is applicable for upgrades to Symfony version 6.* or 7.*.
Symfony versions 6 and 7 enforce native return types for almost all functions. This could lead to compatibility issues where overridden methods in child classes do not match the return types defined in parent classes. When running in the dev environment, you will see deprecation notices for classes used in the request.
To streamline this process, Symfony provides the symfony/error-handler component. This tool can automatically correct incompatible method declarations based on the Composer autoload class map. Once installed, generate a complete class map using Composer, then run the script to iterate over the class map and fix any incompatible method like so:
## Make sure to add the -o option.
composer dump-autoload -o
## Automatically patch all incompatible method declarations
./vendor/bin/patch-type-declarationsFor further customization and options available with this script, refer to the Symfony Documentation Page.
Upgrading to a New Minor Version
Upgrading to a minor version typically doesn't involve breaking changes, but there can be exceptions, especially with third-party packages. To ensure a smooth transition, follow this process.
Updating the Symfony Library via Composer
Update the version numbers in the composer.json file as follows:
{
      "...": "...",
      "require": {
-         "symfony/config": "6.3.*",
+         "symfony/config": "6.4.*",
-         "symfony/console": "6.3.*",
+         "symfony/console": "6.4.*",
          "...": "...",

		“...”: “A few libraries starting with symfony/follow  their own versioning scheme. You do not need to update these versions you can upgrade them independently whenever you want”,

“symfony/monolog-bundle”: “^3.10”
      },
"...": "...",
}
The composer.json file will also have an extra JSON block that you’ll need to update as well like below.
"extra": {
    "symfony": {
        "...”: “...”,
-		"require": "6.4.*"
+		"require": "7.0.*"
    }
}
Handling Dependency Errors
While running the composer update "symfony/*" command, you might encounter issues that require upgrading other libraries. In such cases, use the modified command below to update all dependencies:
composer update "symfony/*" --with-all-dependenciesThis ensures all related packages are enabled and updated properly. However, if an error persists, it’s likely due to version constraints you've manually set in composer.json. These constraints might conflict with another package's requirements. If numerous dependencies throw an error message, use the composer why-not command:
composer why-not symfony/console 5.4

root dev-main requires symfony/console (5.3.*)

Not finding what you were looking for? Try calling `composer require "symfony/console:5.4" --dry-run` to get another view on the problem.
After resolving issues, commit all changes to your Git branch.
With version constraints specified in composer.json, run the following to upgrade packages:
composer updateCheck each package's repository for important changes, especially if they don't follow semantic versioning. Commit any changes you make.
Updating Your Code to Work with the New Minor Version
Even with careful upgrading, minor version bumps may deprecate some features. Check the relevant UPGRADE file in the Symfony repository (e.g., UPGRADE-6.4.md) for guidance on necessary changes. The following image shows an example of a breaking change in the UPGRADE-7.1.md file.
Updating Recipes
When you upgrade to a new Symfony version, updated Symfony Flex recipes may be available or you may want to update your already-installed recipes. To do this, make sure your Git branch is clean then, in Composer, run:
composer recipes:updateYou'll get a list of packages with updated recipes and you can select the ones you'd like to update:
composer recipes:update

Which outdated recipe would you like to update? (default: 0)
[0] symfony/console
[1] symfony/framework-bundle
[2] symfony/routing
Review changes using git diff and resolve any conflicts.
Executing the Upgrade
Setting the .env File
Symfony now uses the .env file (and its variants like .env.local, .env.prod.local, etc.) for environment variables. Some components might offer additional methods to configure the application. Check Symfony's .env documentation for details on available environment variables for any packages you're using.
Adjusting Configs and Routes
In Symfony 3.x, files are organized in bundles and the main configuration is under app/config. In Symfony 4.x, configuration files are in the root config folder. Routing is handled in config/routes.yaml. Compare your existing codebase with the 4.x documentation to see what needs changing.
Migrating Bundles and Services
Copying Controllers, Entities, Repositories, and Services
In Symfony 4 and above, everything like Controllers, Entities, Services, and Repositories live in the src folder. Here’s a simple example of what you need to change: Move:
src/ProductBundle/Controller/CRUDController.php to:
src/Controller/ProductController.php Update the namespace:
namespace App\Controller; And change the class declaration from:
class CRUDController extends Controller to:
class ProductController extends AbstractController Do similar updates for other folders as needed.
Post-Upgrade Tasks
After the upgrade has been completed it's time to test that everything in your app still works and fix a few more issues that might remain.
Fixing Assets URL
Once upgraded you'll need to ensure the path to your assets URL is properly configured. This is especially important if upgrading to a major version.
If you're already using the Symfony asset component to handle generation and versioning of assets, you won't have hardcoded URLs. Instead, you'll have the assets in a public folder and you'll just have to replace the path in your templates like below:
href = "{{absolute_url( asset('Resources/public/css/menu.css'))}}"to
href = "{{absolute_url(asset('css/menu.css'))}}"Updating Entities (if necessary)
When migrating from Symfony 3 to a major version, it's common to encounter situations where the entities in the app need to be updated. This is especially important if your Symfony 3 app and the updated version are using the same development database.
Symfony's database and Doctrine documentation is great for learning more about how to work with databases and Symfony/PHP.
If you have to update your entities after the Symfony upgrade, you should first review the changes made to your entities between Symfony 3 and the newer version to identify new properties or relationships that need to be added and any deprecations.
Then update the entity definitions based on your findings, adding new properties and relationships as required and removing any deprecated methods and rules.
Then update your database schema to reflect the changes. You can use Doctrine's migrations tool to generate a migration file and then run the migration to apply the changes to the database schema.
Then test the application to ensure it's still working as intended.
Conclusion
Upgrading Symfony is pretty straightforward if you keep your codebase updated regularly and don't skip any updates, especially major ones. Always check changelogs and upgrade documents to minimize issues, especially when third-party packages are in the mix. Doing this will help ensure success when trying to me
Although the Symfony documentation is excellent, this guide offers a structured way to tackle upgrades and hopefully solve any issues you might run into in the future whilst upgrading your Symfony project.


