Simple Docker setup for Symfony project
It is no longer the case at Accesto that we work on projects without Docker. Of course, projects are not born dockerized, someone has to do it. Sometimes I do. I am a PHP developer and I work the most with Symfony framework on a daily basis. In this article, I will present an example development Docker configuration for the Symfony project.
So let's use Docker in a Symfony project.
When it comes to Docker setup, there is no one-size-fits-all solution. It always depends on particular project needs. But some good practices should be followed, for example, those described in the official Docker documentation
Let's imagine we take over an existing project, a simple one, PHP, Symfony, MySQL database, that's all. But there is no Docker. So instead of installing a local web server, the appropriate PHP version, the appropriate database engine, etc., the first thing to do is... dockerize!
Why should I spend time on dockerizing first? Because I will do it once, and everyone working on this project will benefit from it. You can read more about why it is worth using Docker in the article of our CEO Piotr.
Also if you have never used Docker and you are wondering if you should install Docker to use in your Symfony project, we have an article where we look at the benefits and downsides of using Docker in a project.
I assume you already have Docker Engine and Docker Compose installed, if not, you should do so (check how to install Docker).
Now let's focus on what we need. This project is currently running on Apache, PHP 7.4 and MySQL 5.7.
Configure Docker using Docker compose
I have added the docker-compose.yml file in the main project directory, and I defined our first container in it - the one with the database. File docker-compose.yml is a Docker Compose configuration file, used to define how Docker Compose should manage and run Docker applications.
At the beginning of the file, you can (from version v1.27.0 it is optional) define the version of the configuration. Different versions of Docker Engine + Docker Compose work with different versions of the configuration, which you can check here.
version: '3.8'MySql database in Docker container
Let's start by defining the first service, the database. First, the name, I chose “db”:
version: '3.8'

services:
    db:
After that I had to define what db service is. For example, we can use the image option. As an image, I had to select the appropriate Docker image. We can use ready-made images available on the web for this. Most of the tools come with Docker images. And to search for these images, we can use the search engine.
In my case, the project uses MySql version 5.7 and such an image is also available so I could just use its name:
version: '3.8'

services:
    db:
        image: mysql:5.7
As per the documentation for this image, some things in this docker container can be configured using environment variables.
One variable is mandatory, this is MYSQL_ROOT_PASSWORD. As you might guess, this is the MySql root superuser password. But there are a few other variables that are helpful, I used the following: MYSQL_DATABASE, a database with this name will be created during image startup. If we define MYSQL_USER, MYSQL_PASSWORD, a user with this name and password will be created, and he will have granted superuser access to the database defined in MYSQL_DATABASE.
version: '3.8'

services:
    db:
        image: mysql:5.7
        environment:
            - MYSQL_ROOT_PASSWORD=somerootpass
            - MYSQL_PASSWORD=somepass
            - MYSQL_DATABASE=dockerizeme_db
            - MYSQL_USER=someuser
Symfony Docker image
But there are no ready-made images for everything. For example, there is no ready image for a web server configured according to the needs of our Symfony application. There is of course an image for Apache server, or Nginx, but a proper apache or nginx configuration file is something for us to define and bundle inside our custom docker image made for Symfony.
So while defining the container for our web server with PHP, I did not use the image option with the name of the ready image, but I used the build option with directory (.) that contains the file (Dockerfile) from which the image will be built (otherwise you would have to use docker build command yourself each time before you launch your local env). But we will get back to Dockerfile soon.
version: '3.8'

services:
    db:
        # cut for readability, see above
    web:
        build: .
Going further. It would be nice to add a basic Apache configuration to our web / php container. I added the docker directory in the main project directory, where I will keep files related to the Docker environment configuration. Then, in that directory, I added the apache.conf file. This file is a very basic configuration of a web server.
<VirtualHost *:80>
    DocumentRoot /var/www/public

    <Directory /var/www/public>
        AllowOverride None
        Order Allow,Deny
        Allow from All

        <IfModule mod_rewrite.c>
            RewriteEngine On
            RewriteCond %{REQUEST_FILENAME} !-f
            RewriteRule ^(.*)$ index.php [QSA,L]
        </IfModule>
    </Directory>
</VirtualHost>
Let's make our container accessible "from the outside". I used the ports option for this. Port 80 from the inside of the container will be exposed to the outside at port 8080. If in the future you decide to separate the web container (apache) from PHP container (Symfony) you will expose only ports from the web one, no need to have php fpm ports available from the outside.
version: '3.8'

services:
    db:
        # cut for readability, see above
    web:
        # cut for readability, see above
        ports:
            - 8080:80
Why didn't I put it on port 80 but 8080? Because we often have Apache running locally on port 80, so we would have a conflict and the Docker container wouldn't start.
Finally docker-compose.yml looks like this:
version: '3.8'

services:
    db:
        image: mysql:5.7
        environment:
            - MYSQL_ROOT_PASSWORD=somerootpass
            - MYSQL_PASSWORD=somepass
            - MYSQL_DATABASE=dockerizeme_db
            - MYSQL_USER=someuser
    web:
        build: .
        ports:
            - 8080:80
Dockerfile for Apache and PHP part
Now we need to take a step back. Let's go into the details of our web image (for our web / php container). To define it, I added a Dockerfile file to the main project directory. Of course, we will use the ready-made public image as a starting point, and slightly adjust it to our needs. I used the php:7.4-apache image as a base.
At the beginning of Dockerfile, I defined the Docker image which is our base:
FROM php:7.4-apacheThen I enabled Apache mod_rewrite:
RUN a2enmod rewriteAfter that, I did the classic update, several packages were installed such as libzip-dev (needed for zip which is needed for composer) and git wget via apt-get install. Also some extensions such as pdo mysqli pdo_mysql zip via a docker-php-ext-install mechanism, more about that you can find in base image documentation. In the meantime, I also deleted files that are unnecessary in the container, they would only take up space.
RUN apt-get update \
  && apt-get install -y libzip-dev git wget --no-install-recommends \
  && apt-get clean \
  && rm -rf /var/lib/apt/lists/* /tmp/* /var/tmp/*

RUN docker-php-ext-install pdo mysqli pdo_mysql zip;
The application uses Composer to manage dependencies in our application, so I installed in the container:
RUN wget https://getcomposer.org/download/2.0.9/composer.phar \
    && mv composer.phar /usr/bin/composer && chmod +x /usr/bin/composer
I copied the Apache configuration file to the appropriate place in the container, and our project files to /var/www in the container:
COPY docker/apache.conf /etc/apache2/sites-enabled/000-default.conf
COPY . /var/www
Instruction WORKDIR sets the working directory for other instructions, for example for the RUN command:
WORKDIR /var/wwwAnd last command to run Apache in the container foreground:
CMD ["apache2-foreground"]To sum up, we have such Dockerfile for web container:
FROM php:7.4-apache

RUN a2enmod rewrite

RUN apt-get update \
  && apt-get install -y libzip-dev git wget --no-install-recommends \
  && apt-get clean \
  && rm -rf /var/lib/apt/lists/* /tmp/* /var/tmp/*

RUN docker-php-ext-install pdo mysqli pdo_mysql zip;

RUN wget https://getcomposer.org/download/2.0.9/composer.phar \
    && mv composer.phar /usr/bin/composer && chmod +x /usr/bin/composer

COPY docker/apache.conf /etc/apache2/sites-enabled/000-default.conf
COPY . /var/www

WORKDIR /var/www

CMD ["apache2-foreground"]
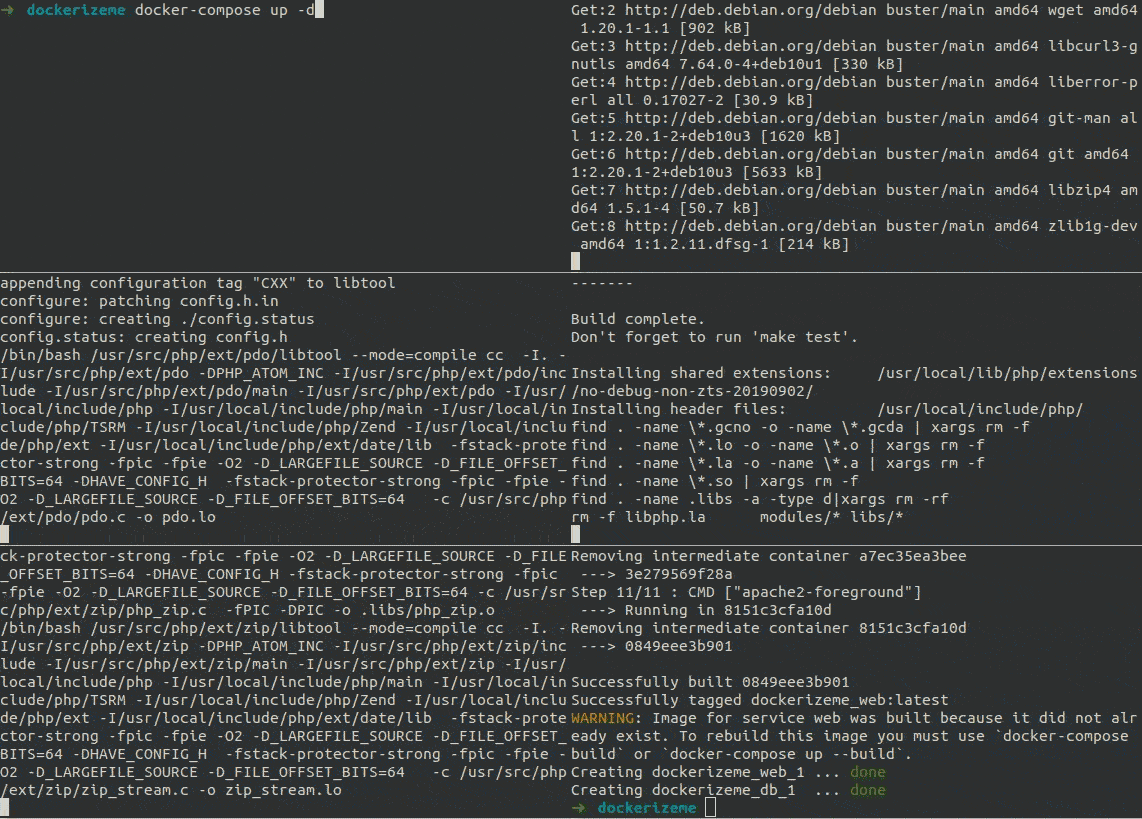
Is it all the docker configuration needed? As for the minimum, yes! Now if I run the docker-compose up -d in the project directory in the console, docker containers will be created and the whole Symfony project will start running.

But wait a minute. Let's see if it really works:

Of course not ;). Our project needs a few more steps. For example, what about composer install? Database migrations? Now we can describe these steps in the Readme of the project. It would be something like “enter docker container (docker-compose exec web bash) and run composer install in the container, then run migrations (bin/console doc:mig:mig)”.
Improvements in the startup of a dockerized project
We can try to "automate" these steps, for example by using Entrypoint. Using Entrypoint is not the best solution, but it will facilitate development at this stage. Let's assume that I want to run every time the docker container is started:
- composer install
- new database migrations to be loaded (via symfony cli command)
- fresh fixtures (dummy/test data) in the database.
So I added entrypoint.sh in docker directory with a simple script to do it
#!/usr/bin/env bash

composer install -n
bin/console doc:mig:mig --no-interaction
bin/console doc:fix:load --no-interaction

exec "$@"
Then I had to slightly modify our Dockerfile for the core of our Symfony application:
FROM php:7.4-apache

# … cut for readability

COPY docker/apache.conf /etc/apache2/sites-enabled/000-default.conf
COPY docker/entrypoint.sh /entrypoint.sh

# … cut for readability

RUN chmod +x /entrypoint.sh

CMD ["apache2-foreground"]

ENTRYPOINT ["/entrypoint.sh"]
I COPY the new script file to the web / php container and add executable permissions to that file. At the end of the Dockerfile, I defined that the file is Entrypoint
Now I had to rebuild the Docker image to apply these changes docker-compose build web, and restart the docker containers. Let's check our application:

It works! Now, anyone who downloads this project and has Docker can simply run it.
Can you also work with Docker on a Mac? You can read about it in the latest post by Krzysiek here :)
Docker is a powerful tool, I only showed you a minimal snippet that will allow you to start your Symfony project in a box. You can find more practical tips and advanced Docker optimization techniques in our free e-book Docker Deep Dive


