Docker reverse proxy using Traefik
Why you might need a reverse proxy server?
The need to introduce a reverse proxy to a docker compose config file is quite popular. Some common use cases are:
- routing inbound traffic to the right container in multi-container environments (heavily used by me in PHP refactoring projects using the strangler pattern), ex. route the request to the right web servers
- terminate SSL (ideally using Let's encrypt?)
- allow for load balancing in multiple backend servers environments
- basic auth
- IP whitelist/blacklist
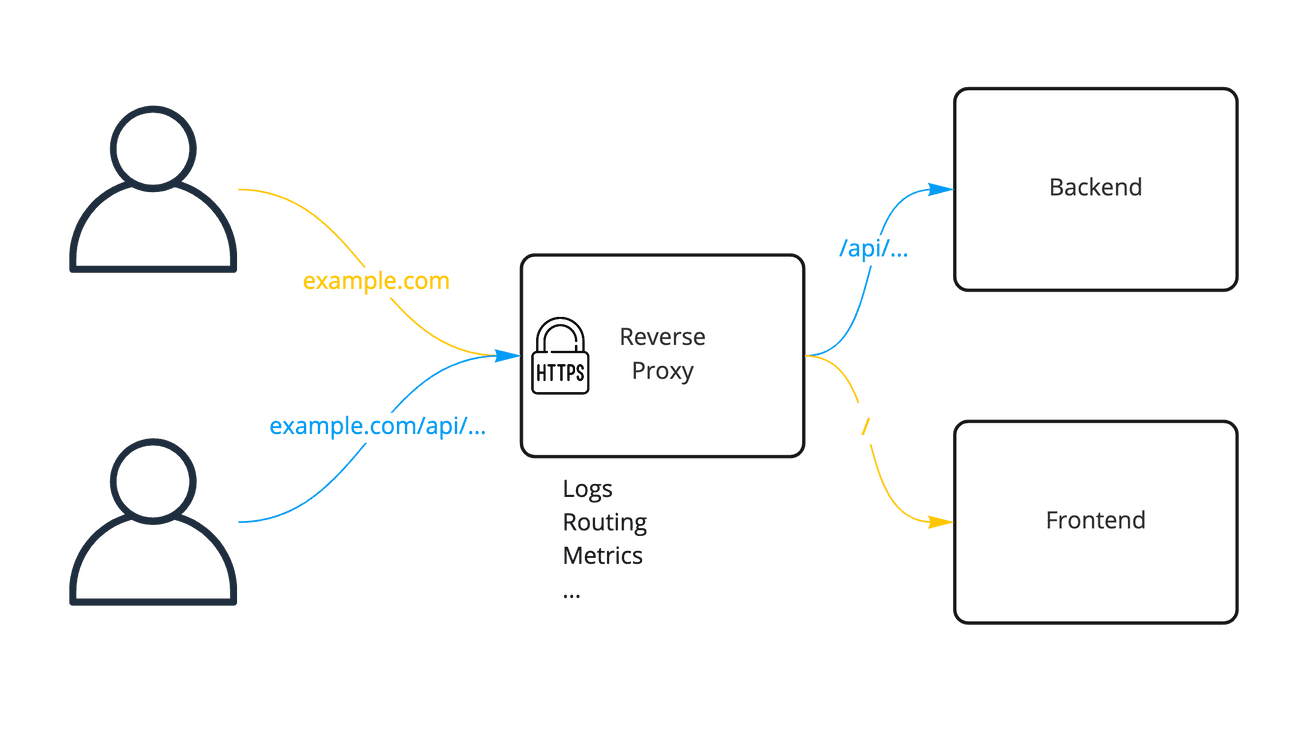
As you can see in the image below, an exemplary reverse proxy sits in front of your application and can terminate the SSL connection, and then route the client requests to the correct backend web servers.
Using a reverse proxy, you can also split incoming traffic onto multiple servers, all working inside an internal network and exposed under a single public IP address.
An interesting fact is that a good reverse proxy can also protect you from hacker requests, for example by filtering out malicious HTTP requests - like the recent log4j vulnerability.
A common approach to reverse proxy servers in Docker
There is a popular solution that is using NGINX reverse proxy as the server. It is configured using labels, and thus quite easy to implement. In fact, I have used it for the last few years quite often.
The problem with it was when I had to add some more sugar to it, like SSL, basic auth or some compression. This is supported by the mentioned nginx-proxy, but is a bit hard to configure in some cases. F.e. adding Let's encrypt requires adding yet another container, and if something fails, you need to look for issues in multiple places.
A better approach? Traefik reverse proxy!
A couple of months ago, I had (again) a need for a reverse proxy server for one of our new projects. I was setting up a review-apps environment and needed something efficient, but also stable. In most cases, I would reuse the mentioned NGINX setup, but I hit some issues with it in the past, mostly connected with no debug possibilities, so I decided to give Traefik a try.
Do you know the feeling when you discover a new thing and after a week or two you already wonder how you could have lived without it? That was the case for me with Traefik.
Simplifying a bit, Traefik is built on four main concepts: entrypoint, router, middleware and service. You can configure it to listen for incoming connections on certain entrypoints (ports, for example, TCP/HTTP on port 80), then the incoming request is matched to a route, each request can go through middleware (or a couple of them) - ex. path rewrite, compression, etc.; to finally reach a configured service that was assigned to the matched route. Services will usually map to your containers in the case of Docker, but they can also map to an appropriate server on your network.
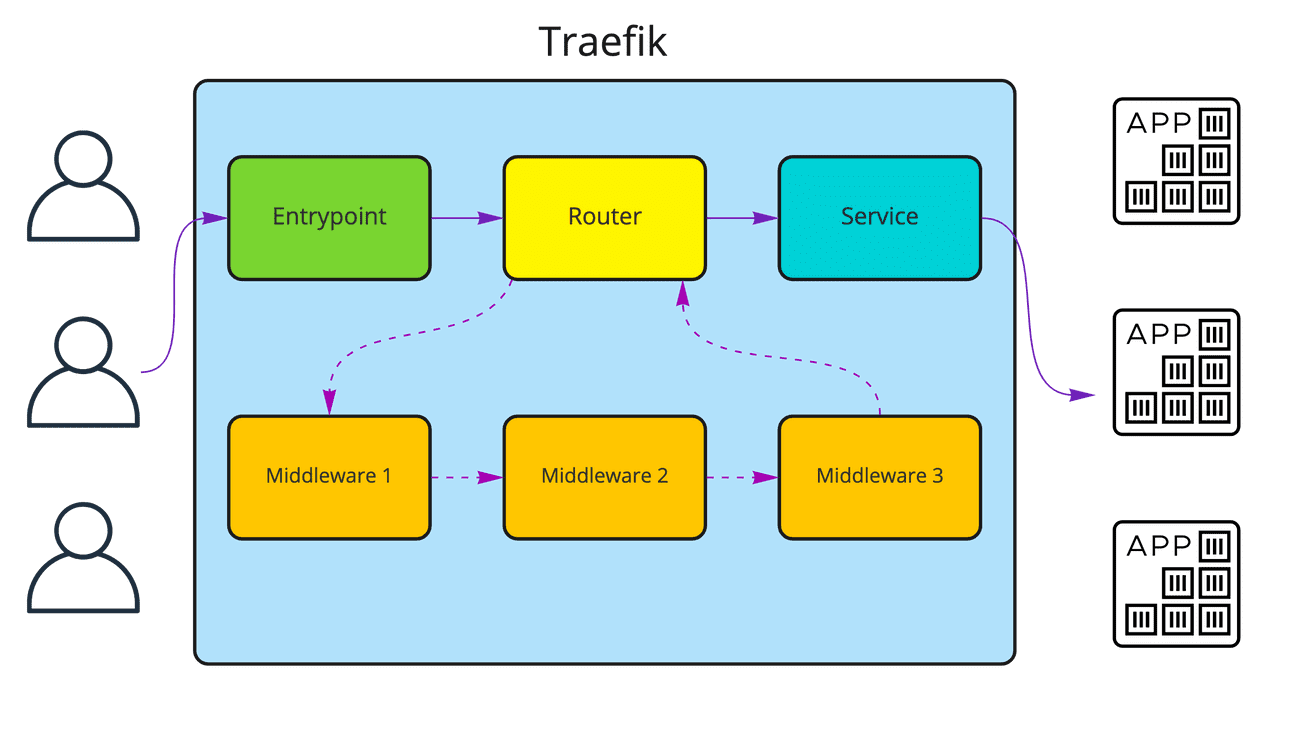
Basic reverse proxy configuration
Traefik supports multiple different configuration providers, including files or even HTTP endpoints, but we will go with the one that works best for me - Docker labels. It's using the same approach of labels as ngin reverse proxy, but has a bit more configuration possibilities.
Let's have a look at an example configuration file that uses docker compose and is available in Traefik official documentation.
version: "3.3"

services:
  traefik:
    image: "traefik:v2.6"
    command:
      #- "--log.level=DEBUG"
      - "--api.insecure=true"
      - "--providers.docker=true"
      - "--providers.docker.exposedbydefault=false"
      - "--entrypoints.web.address=:80"
    ports:
      - "80:80"
      - "8080:8080"
    volumes:
      - "/var/run/docker.sock:/var/run/docker.sock:ro"

  whoami:
...--api.insecure=trueallows accessing a Traefik dashboard - that simplifies debugging, but should be disabled outside of development environments due to security reasons;--providers.docker=true- enables the Docker configuration discovery;--providers.docker.exposedbydefault=false-do not expose Docker services by default;--entrypoints.web.address=:80- create an entrypoint calledweb, listening on:80
We expose port 80 to allow access to the web entrypoint, and port 8080 as it is the default dashboard port. We also need to connect a volume with the docker.sock so Traefik can talk with the Docker daemon (and fetch information about running containers).
Now, let's have a look at an example service we would like to expose:
version: "3.3"

services:
  traefik:
    ...
  whoami:
    image: "traefik/whoami"
    labels:
      - "traefik.enable=true"
      - "traefik.http.routers.whoami.rule=Host(`whoami.localhost`)"
      - "traefik.http.routers.whoami.entrypoints=web"
We don't need to expose the port, the only thing required to expose a service is to add a couple of labels:
traefik.enable=true- tell Traefik this is something we would like to exposetraefik.http.routers.whoami.rule=Host("whoami.localhost")- specify the rule used to match a request to this service. Thewhoamipart is a name that you can specify, you can also adjust the Host to your needs. Traefik also supports other matchers, f.e. path, but we will take a look at them a bit later.traefik.http.routers.whoami.entrypoints=web- what entrypoint should be used for thewhoamiservice.
You can specify multiple routers for each container, just alter the router name. Make also sure the router names are unique and you have no collisions where two containers specify the same router name.
My final docker compose file looks like this:
version: "3.3"

services:
  traefik:
    image: "traefik:v2.6"
    command:
      #- "--log.level=DEBUG"
      - "--api.insecure=true"
      - "--providers.docker=true"
      - "--providers.docker.exposedbydefault=false"
      - "--entrypoints.web.address=:80"
    ports:
      - "80:80"
      - "8080:8080"
    volumes:
      - "/var/run/docker.sock:/var/run/docker.sock:ro"

  whoami:
    image: "traefik/whoami"
    labels:
      - "traefik.enable=true"
      - "traefik.http.routers.whoami.rule=Host(`localhost`)"
      - "traefik.http.routers.whoami.entrypoints=web"
Notice the changed hostname on line 22.
Let's run this: docker-compose up -d
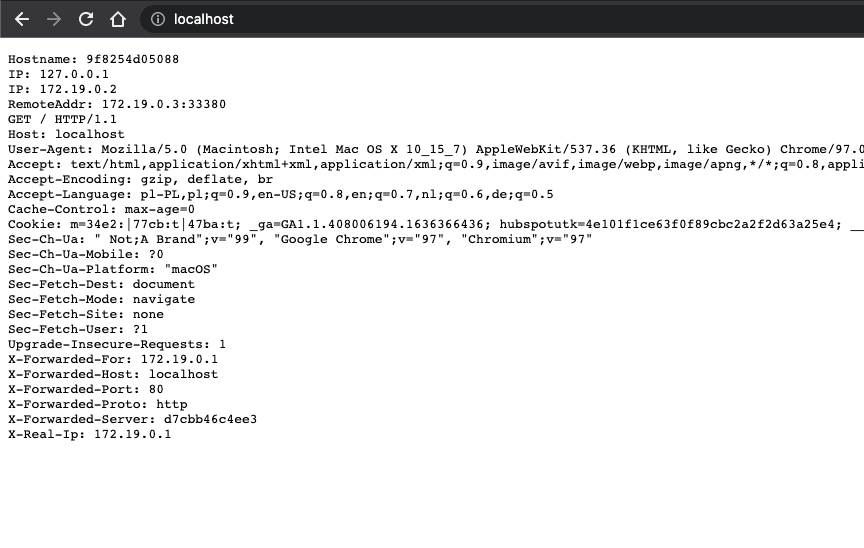
After pulling the images, the service is exposed under localhost:
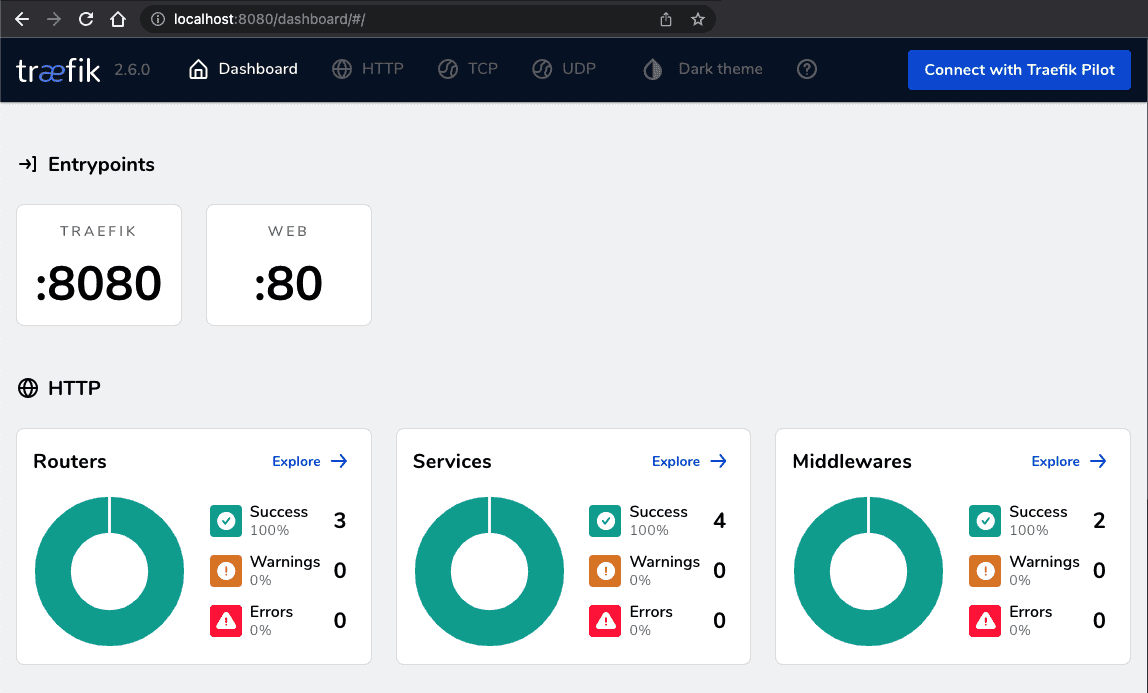
I can also open localhost:8080 to check the current Traefik configuration:
Load balancing
Now here comes the fun part. You already have load balancing in place! If you scale the whoami service in docker-compose:
version: "3.3"

services:
  traefik:
    ...
  whoami:
    image: "traefik/whoami"
    scale: 5
    labels:
      ...
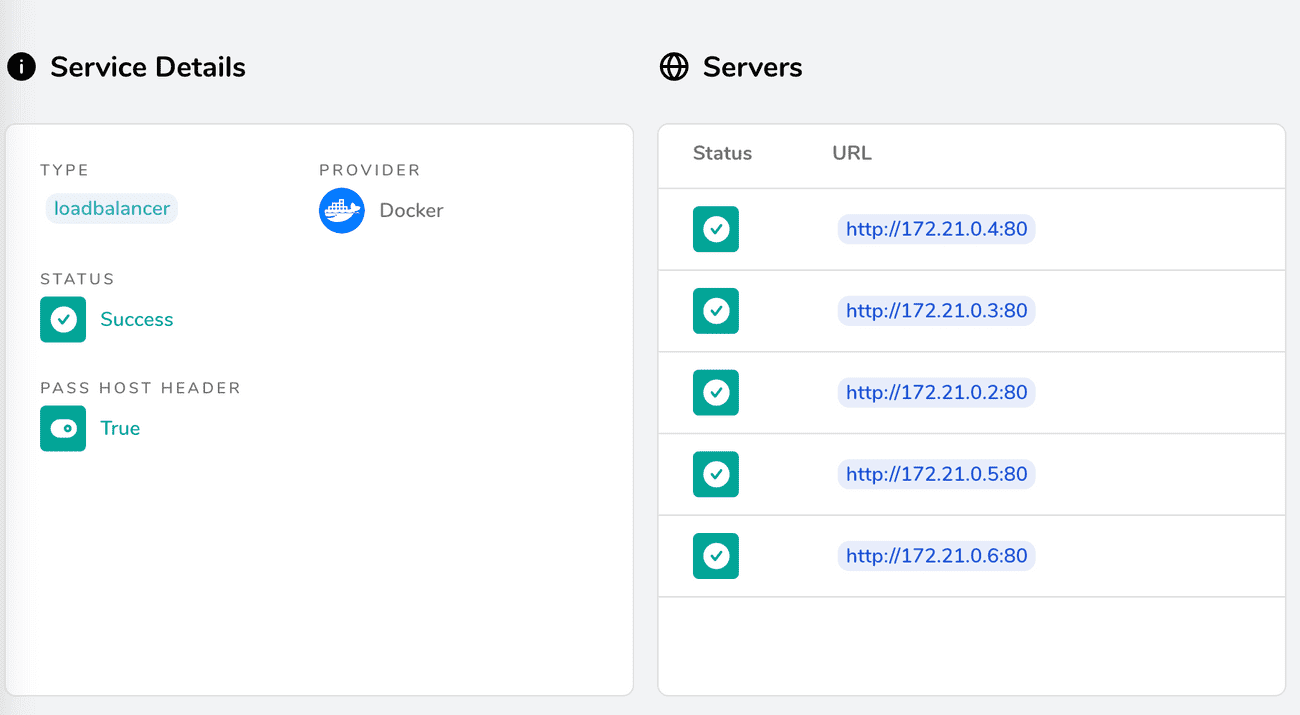
Then Traefik will connect all the containers to the service:
and divide all incoming requests evenly between them. That's it! You have a fully working load balancer
Multiple services and path matching
As you can imagine, adding more services to the reverse proxy is quite easy. We can make them use different domains - by providing a different domain inside Host("localhost"). But we can also route the services by path. Let's add a new service to the docker-compose.yml file we created previously:
...
  whoami2:
    image: "nginxdemos/hello"
    scale: 1
    labels:
      - "traefik.enable=true"
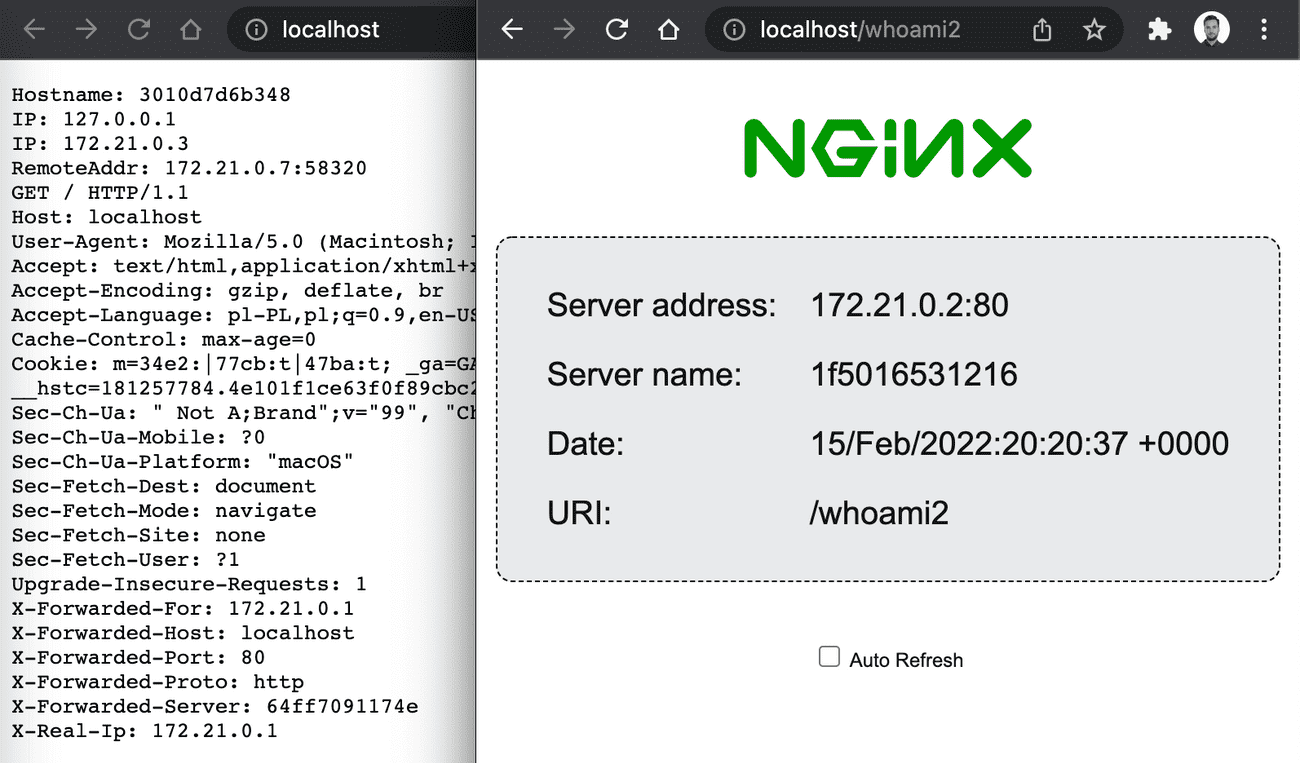
      - "traefik.http.routers.whoami2.rule=Host(`localhost`) && Path(`/whoami2`)"
      - "traefik.http.routers.whoami2.entrypoints=web"
Notice three changes:
- I have used a different image, so something else is served through HTTP.
- I have switched the name in the routers part to
whoami2- to avoid name collision - I have added
&& Path("/whoami2")to routing rule. So now both the hostname has to matchlocalhostand the path needs to be exactlywhoami2.
If you need to match a path prefix, not only an exact match, you can use PathPrefix("/whoami2") instead.
SSL encryption
I also quite often need a thin layer between my app and the client, that could take the SSL certificate creation and updates off my shoulder. Let's Encrypt did a great job, but when the task is to quickly expose a Docker service it required some tricks.
Thankfuly, Traefik has built-in certificate resolvers. How does this work? Well, you just specify what SSL certificate provider you would like to use, and then it will handle all the required certificates. So if I have a running instance of Traefik and add a domain like accesto.com for one of the containers - it will automatically call the resolver. In the example case, the resolver is Let's Encrypt, and it will fetch the certificate for me.
Let's have a look at a slightly modified example we started with - the one with one exposed Docker container.
version: "3.3"

services:
  traefik:
    image: "traefik:v2.6"
    command:
      #- "--log.level=DEBUG"
      - "--api.insecure=true"
      - "--providers.docker=true"
      - "--providers.docker.exposedbydefault=false"
      - "--entrypoints.web.address=:80"
      - "--entrypoints.websecure.address=:443" # new
      - "--certificatesresolvers.myresolver.acme.tlschallenge=true" # new
      - "[email protected]" # new
      - "--certificatesresolvers.myresolver.acme.storage=/letsencrypt/acme.json" # new
    ports:
      - "80:80"
      - "443:443" # new
    volumes:
      - "/var/run/docker.sock:/var/run/docker.sock:ro"
      - "./letsencrypt:/letsencrypt" # new
(...)
Let me start with the changes added to Traefik labels. There are 4 new lines [12-15]
- Line 12 - we need to add a new SSL entrypoint - websecure, listening to the HTTPS 443 port
- Line 13 - enable the acme tls challenge for
myresolvercertificate resolver - Line 14 - provide e-mail used by let's encrypt to send important information
- Line 15 - path to a JSON file where the certificates will be stored
Then some additional changes:
- Line 18 - expose the 443 port
- Line 21 - link the file where certificates are stored to a file on the local disk, so updating Traefik does not require fetching all certificates again.
There are some changes, but I believe all are quite simple and should be easy to understand. Now let's look at what's changed in the configuration for app service:
(...)
  whoami:
    image: "traefik/whoami"
    labels:
      - "traefik.enable=true"
      - "traefik.http.routers.whoami.rule=Host(`mydomain.com`)"
      - "traefik.http.routers.whoami.entrypoints=web,websecure" # changed
- "traefik.http.routers.whoami.tls.certresolver=myresolver" # new- Line 29 - we added the
websecureentrypoint to the list, so our service is now available both via HTTP and HTTPS; - Line 30 - we notified Traefik, it should use
myresolverto get the SSL certificate for this service.
And that's actually it. If you now run docker-compose up -d Traefik will automatically fetch the certificate and use it.
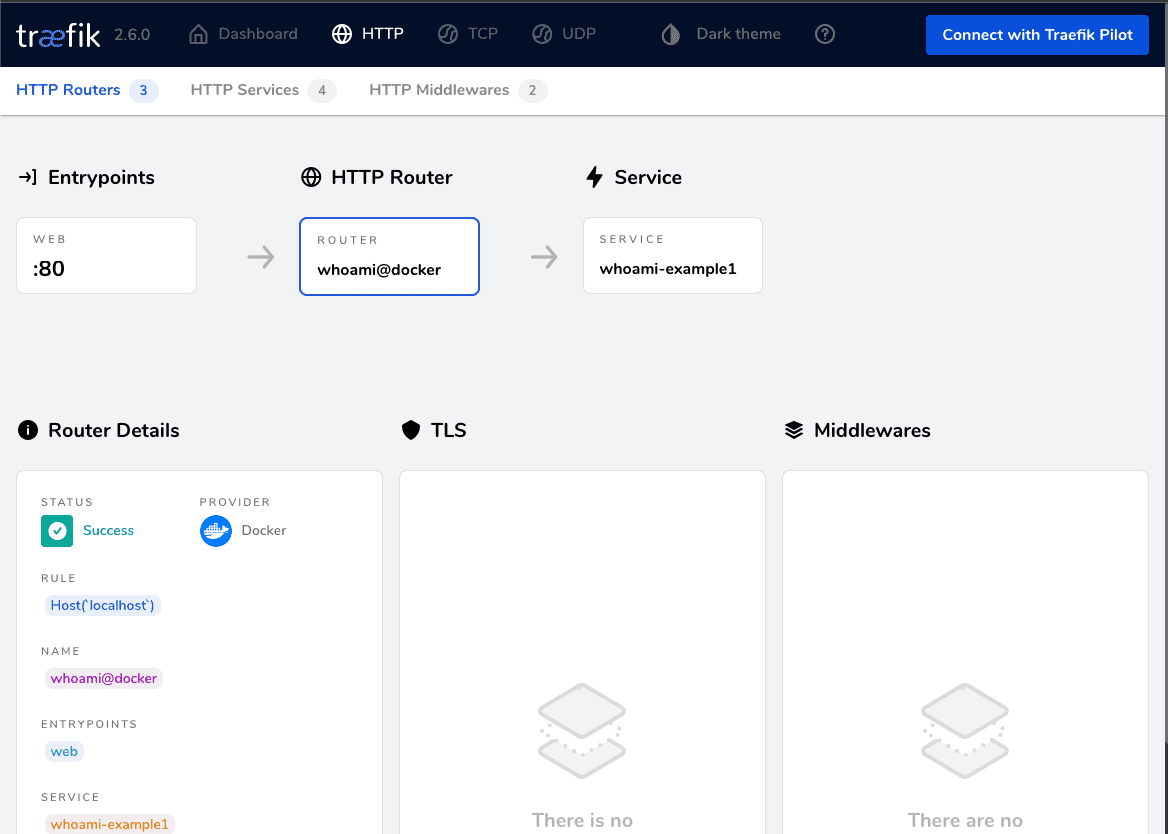
You can also check the Traefik dashboard to see the SSL status for a router:
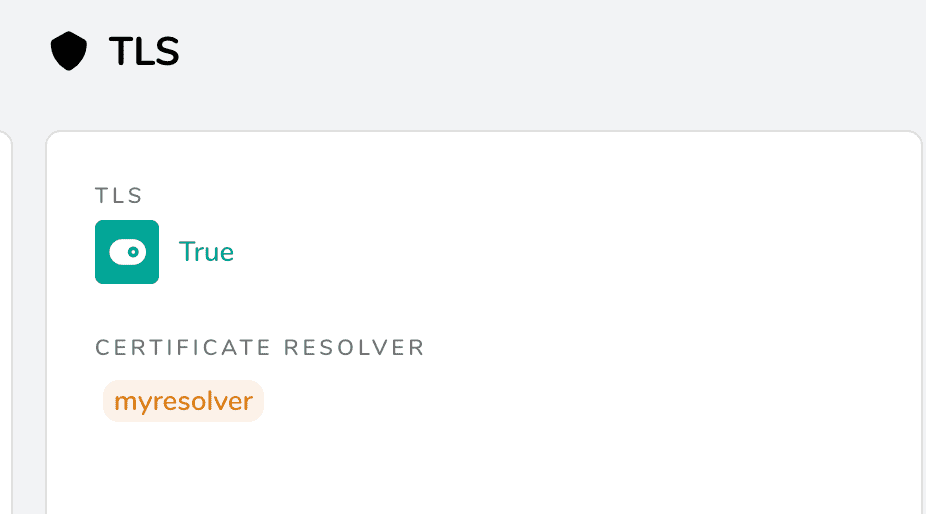
And that's actually everything you need to do in order to have a docker reverse proxy with SSL termination.
Middleware features
Following the previous steps, you have a fully working reverse proxy, with an in-built load balancer and SSL encryption. Nice right? But in my case, I quite often need to secure access to such endpoints. F.e. whitelist incoming IPs or require a username and password. This could obviously be done in the exposed application, but I think that a reverse proxy is a better place for this. This is also another thing that Trafeik does better than the nginx reverse proxy. It comes with lots of different middlewares, that allow to cover more scenarios. Let's have a look at a couple of them:
IP Whitelist
Web application security is key, so how can you add an IP whitelist? It's just two new labels:
(...)
  whoami:
    image: "traefik/whoami"
    labels:
    (...)
        - "traefik.http.middlewares.whoami-filter-ip.ipwhitelist.sourcerange=192.168.1.1/24,127.0.0.1/32"
        - "traefik.http.routers.whoami.middlewares=whoami-filter-ip"
In this case, whoami-filter-ip is our middleware name, and it has to be unique. The provided IP list will be allowed to access your service, other sources will get a 403 Forbidden.
Basic auth
Quite frequently, we need to secure websites by adding a basic auth in front of it. Adding basic auth is also pretty simple and uses the same approach of middleware.
(...)
  whoami:
    image: "traefik/whoami"
    labels:
    (...)
      - "traefik.http.middlewares.whoami-auth.basicauth.users=test:$$apr1$$ra8uoeq5$$HqiATqC5edVVEXznsNiVV/,test2:$$apr1$$8ol2akty$$BW.Fsa.K3tc1DzcJ6l9ql1"
      - "traefik.http.routers.whoami.middlewares=whoami-auth"
To create a user and password pair, run:
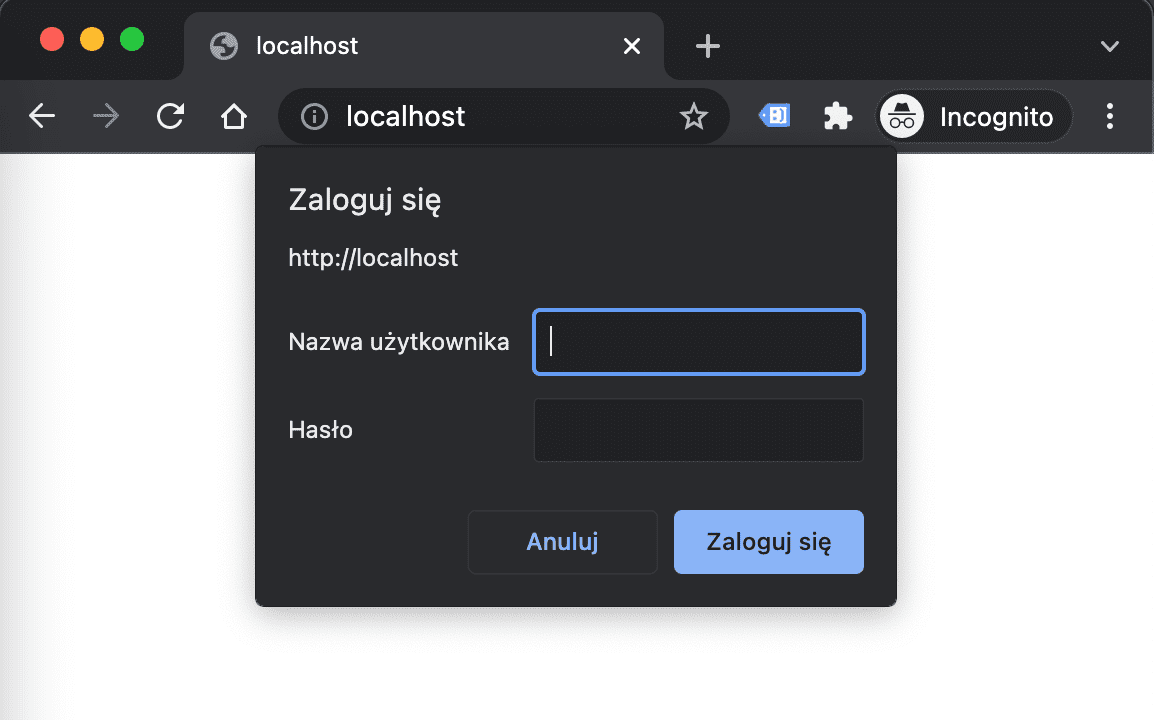
echo $(htpasswd -nb user password) | sed -e s/\\$/\\$\\$/gIf you open the page now, it will ask for credentials:
Please note the sed part, it's required to replace single $ with double $$, so docker compose does not treat it as an env variable.
Is there more?
Of course, there is. Traefik supports not only HTTP, but also TCP connections (like the one to a database). It also comes with different middlewares built-in. You can easily add custom headers (f.e. strict transport security), rate limiting, redirects, retries, compression, circuit breaker, custom error pages, etc.
Summary
Creating a reverse proxy server with Traefik, including load balancing, web application security, service discovery or even SSL termination with automated Let's Encrypt certificates is quite easy.
I was able to cover all my needs within minutes, and even more - I managed to create a simple review apps environment combined with our Gitlab CI instance. If you are interested in how I did that - give me a shout and subscribe to our newsletter to not miss that article.
Recently my colleague posted a blog post where he checks how the Dockers work on the MacBook Pro with an M1 Pro chip. Give it a look if you are interested in running a Docker on your new MacBook.
If you are interested in Docker, check out my e-book: Docker deep dive
Check out my previous articles on Docker networking in order to separate services and test failure scenarios:
